Homemade Raspberry Jam
Alright, perhaps by now you know I’m a freak of sorts and need to exactly know the purpose of each ingredient that goes into the food that my family eats! So, each time we bought jam or marmalade from the store, I couldn’t bear the thought of that pectin and additional preservative sneaking its way into our lives.
I’ve been pondering for sometime now on what would make that perfect jam. I’ve watched my mum make yummy apple sauce for tarts (this was just after my son was born and strangely, my sweet and sour taste buds were still craving!) and wondered if that sauce could be cooked longer to thicken up and form jam.
So, one fine experimental day, it did! And all I used were three simple, everyday ingredients. Some fruit, some sugar and some lemon juice. And, approximately an hour to make my HOMEMADE raspberry jam.
I made mine with raspberry, but of course you can experiment with whatever fruit is in season. Mangoes, strawberries, blueberries, rhubarb anything at all. (Apples and grapes though require that additional peeling effort). This jam stays for about a month and a half if stored in a sterilized, dry jar and refrigerated when not in use.
So then, bid farewell to store bought jams!
Ingredients
1/2 a kilo of raspberry or fruit of your choice
1/2 cup sugar
2 tablespoons lemon or lime juice to prevent the sugar from crystallizing
Method
Begin with prepping the fruits. Wash and lightly mash them in a bowl. I like little chunks of fruit in my jam and so I don’t go overboard with the mashing. (It really is a matter or choice as to how much you want to mash your fruit especially, if using small berries).
Transfer the mashed fruit into a sauce pan and cook until the mixture comes to a slight boil. Now add the sugar and the lemon juice and mix well. Cook for approximately 30 to 35 minutes on low flame. Keep stirring every 3 to 5 minutes otherwise, you’re at the risk of burning the mixture.
After 15 minutes, you will notice the mixture thickening and also the white air bubbles disappearing. Keep going for another 15 minutes. All along, stir every 3 minutes. Once you have crossed 20 to 25 minutes, you will notice jam forming along the sides of the saucepan and you know you’re getting there really soon :)
Once thick jam has formed (which is approximately at the end of 30 to 35 minutes), turn off the heat and leave the mixture to cool for about 5 minutes.
When the mixture is still warm, transfer it to a clean glass jar for storage. You will notice that even while just left to cool, the mixture has considerably thickened and that is why it’s important to transfer it to the storage jar while it is warm. Once completely cool, it’s a messy process to do. (And really sticky!).
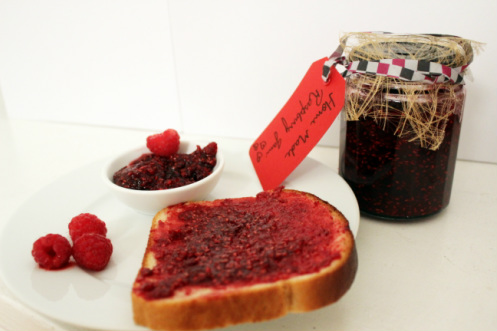
So, there you have your little jar of homemade jam. Makes for a perfect special gift to family and friends!
I’ve been pondering for sometime now on what would make that perfect jam. I’ve watched my mum make yummy apple sauce for tarts (this was just after my son was born and strangely, my sweet and sour taste buds were still craving!) and wondered if that sauce could be cooked longer to thicken up and form jam.
So, one fine experimental day, it did! And all I used were three simple, everyday ingredients. Some fruit, some sugar and some lemon juice. And, approximately an hour to make my HOMEMADE raspberry jam.
I made mine with raspberry, but of course you can experiment with whatever fruit is in season. Mangoes, strawberries, blueberries, rhubarb anything at all. (Apples and grapes though require that additional peeling effort). This jam stays for about a month and a half if stored in a sterilized, dry jar and refrigerated when not in use.
So then, bid farewell to store bought jams!
Ingredients
1/2 a kilo of raspberry or fruit of your choice
1/2 cup sugar
2 tablespoons lemon or lime juice to prevent the sugar from crystallizing
Method
Begin with prepping the fruits. Wash and lightly mash them in a bowl. I like little chunks of fruit in my jam and so I don’t go overboard with the mashing. (It really is a matter or choice as to how much you want to mash your fruit especially, if using small berries).
Transfer the mashed fruit into a sauce pan and cook until the mixture comes to a slight boil. Now add the sugar and the lemon juice and mix well. Cook for approximately 30 to 35 minutes on low flame. Keep stirring every 3 to 5 minutes otherwise, you’re at the risk of burning the mixture.
After 15 minutes, you will notice the mixture thickening and also the white air bubbles disappearing. Keep going for another 15 minutes. All along, stir every 3 minutes. Once you have crossed 20 to 25 minutes, you will notice jam forming along the sides of the saucepan and you know you’re getting there really soon :)
Once thick jam has formed (which is approximately at the end of 30 to 35 minutes), turn off the heat and leave the mixture to cool for about 5 minutes.
When the mixture is still warm, transfer it to a clean glass jar for storage. You will notice that even while just left to cool, the mixture has considerably thickened and that is why it’s important to transfer it to the storage jar while it is warm. Once completely cool, it’s a messy process to do. (And really sticky!).
So, there you have your little jar of homemade jam. Makes for a perfect special gift to family and friends!
Looking for more smoothies & accompaniments? Click here