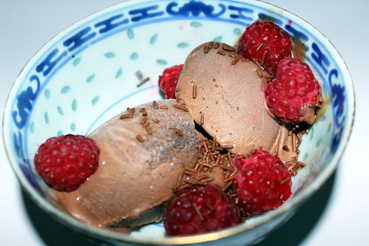
Homemade Chocolate Ice Cream
Well, for me this one originated solely because of my husband’s addiction to ice cream. Friends who know us well perhaps, know what I mean. You could come over to our place even if there’s famine in the land and you will always find some form of ice cream in the refrigerator. That’s how insane we are at times. There could be no milk, eggs or orange juice, or even my son's diapers but, there will always be ice cream! :)
So, one fine day, I washed the empty ice cream container instead of throwing it out determined to make home made ice cream and since then, ice cream continues to be replenished each time but, not with store bought ones.
So, here’s how to beat the retreating summer heat!
Ingredients
100 grams of milk chocolate
100 grams of dark chocolate
1 can of sweetened condensed milk
250 ml of thickened cream (suitable for whipping)
Method
OK, this one is as simple as it can get. No fancy, fussy ice cream machines. Just three steps to digging into some creamy, rich delicious homemade ice cream.
I’m using chocolate, but if you’re up for some banana, mango pulp whatever in the universe you want to make an edible ice cream of, go ahead and experiment. For beginners, a good tip is to keep the quantity of the experiment to 200 to 250 grams. So, don’t go overboard with that.
Alright then, the three steps to bliss! Serious with capital S!
- Melt the chocolate. I usually do this step in the microwave. Break the bars into small pieces and microwave it for about 3 minutes, removing and stirring every 30 to 45 seconds. Alternatively, you could do it using a double boiler on the gas stove. Works the same. A double boiler is basically an arrangement that involves boiling water in a vessel and then placing chocolate in another vessel and placing it over the vessel that has the water such that the water just touches the chocolate vessel. This prevents direct heat and reduces chances of burning the chocolate.
Cool the chocolate until lukewarm. If you’re using fruit, you want to cut it into bite sized cubes and not really mince it as it’s also going to be blended and will be crushed down further. - In a large mixing bowl, pour in the whipping cream and the condensed milk and the melted chocolate. Blend really well. I use a hand blender, but of course you could also use a mixer jar. But the key is in blending it really well to form a thick creamy consistency.
- Pour into a freezer can or any old tin/container that you want to set your ice cream in and freeze overnight or for at least 10 to 12 hours depending on how good your freezer is.
Looking for more desserts? Click here